Fast Tree Removal Services Atlanta

Showing posts with label Pruning. Show all posts

Monday, December 14, 2020

How to Prune Tree Branches

A hand saw can be used to cut a branch up to six inches thick

Prevent dying, infested, and diseased branches from killing your trees. Knowing the basics of pruning branches will help you preserve the health and structure of your trees.

fasttreeremovalatlanta.com gathered the following information about pruning tree branches, including how, why, and when to prune.

Pruning Tree Branches

Correctly pruning branches allows a tree to compartmentalize (seal and isolate) the wound, reducing the risk of rot, disease, or infestation. The following steps will help you properly prune branches from your tree:

Tree Pruning Step 1

Identify the branches you intend to prune. If you are pruning several branches from a tree or multiple branches from several trees, mark them with a ribbon or fluorescent spray paint before you start.

This is also the time to evaluate the safety of your pruning activities. If a branch is out of your reach, growing over your home, or too large (over six inches in diameter), consider hiring a professional tree service to avoid catastrophic or life-threatening accidents.

Note: When cut, larger branches can fall with thousands of pounds of crushing force. Carefully assess the safety of cutting such branches before pruning them.

Tree Pruning Step 2

Prepare a one-gallon solution of 70% water and 30% isopropyl alcohol or bleach. Use this solution to sanitize all of the equipment, tools, and protective gear you intend to use when pruning your trees.

Sanitize your equipment, tools, and gear before starting work on your first tree. Then, sanitize them again before moving on to the next tree.

Note: If you suspect that one of your trees is diseased, save it for last, and carefully destroy all material removed from it. Do not add any diseased material to a compost or mulch pile.

Tip: Pour your sanitizing solution into a spray bottle and spray your equipment for a more efficient application.

Tree Pruning Step 3

Following the 3-cut method will help you avoid bark damage (bark stripping) when pruning medium and large-sized branches. Here’s how to do it:

Cut #1 – This cut is known as a relief cut or undercut and should be approximately 6 inches away from the trunk on the branch’s underside. This cut should be through 1/4 of the branch and serves as a stopping point if the bark tears or strips as the branch falls.

Tree pruning the undercut is cut number 1

Cut #2 – This cut should be 6 inches further out from cut #1. This is a top-down cut and severs the branch’s bulk from the tree.

Tree pruning cut number 2 safely removes branch weight

Cut #3 – This final cut occurs flush with the branch collar, removing the branch’s remaining portion. For proper compartmentalization (healing), avoid damaging the root collar.

Tree pruning cut number three flush with branch collar

Tip: After you have pruned a branch, remove or dispose of it before moving on. Leaving such debris on the ground may interfere with your ability to correctly prune the next branch or flee in the event of a branch unexpectedly falling toward you.

Read more about how trees recover from pruning activities at fasttreeremovalatlanta.com/how-trees-recover-wounds-pruning

Why Prune Trees

Pruning activities should be done with purpose. If you are pruning just to prune, you may cause more damage to your trees than solutions. The following are several of the reasons that justify pruning your trees:

Shaping – If performed early on in the life of a tree, less pruning will be necessary as the tree matures to keep its shape.

Crown Thinning – This type of pruning removes limbs and foliage from within the crown, permitting better airflow and more light to reach inner branches. It also reduces pressure on the tree during severe weather events.

Crown Raising – Removes lower branches that may be resting on the ground or in the way.

Storm Damage – After severe weather events, you should prune out any damaged branches. Leaving these damaged limbs may result in disease and/or infestation.

Storm damage should be pruned from a tree when it happens

Disease – Branches showing signs of disease like wilting foliage, chlorosis, cankers, dieback, or a combination of symptoms.

Infestation – Branches exhibiting signs of infestation will look similar to those of disease but accompanied by D-shaped or round exit holes (for beetles), carpenter ants entering and exiting holes and/or cavities (this is a sign of significant decay), and visual confirmation of adult boring or detrimental insects.

Depending on the severity of infection or type of insect infestation, you may need to remove your tree as a measure of protection for your other trees and property. Read more about when pruning or removal is necessary at fasttreeremovalatlanta.com/when-tree-pruning-cutting-emergency-removal-atlanta-ga

When to Prune Trees

Most pruning activities should be restricted to the dormant season, being late fall through early spring (before bud break) for most tree species. Everything slows down during a tree’s dormancy, leaving the tree less susceptible to disease and insect infestation. Consider the following:

The best time to prune trees is during their dormancy usually in winter months

Fruit Trees should be pruned in early spring (before bud break) while the tree is still dormant and leafless.

Evergreens (all of them), except pines, should be pruned before new growth emerges in the spring or during the semi-dormant period in mid-summer. When pruning, it is imperative to follow branching patterns to maintain the tree’s natural shape.

Pines should be pruned in the spring as new growth emerges. To produce a compact, uniform plant or to maintain a shape, cut one-third to one-half of each growth area as it expands in the spring. Avoid pruning back to woody stems; new growth cannot develop from these areas.

When mature pines are overgrown or become a nuisance, the better option is usually to remove entire branches at a time.

Spring Flowering Trees respond best to pruning immediately after blooming.

Later Flowering Trees should be pruned in late winter or early spring.

Note: If you are in doubt of your tree’s species and/or pruning requirements, hire a certified arborist to help you give your tree the proper care.

Tree Pruning Tools

The correct tools will facilitate better pruning results. Keeping these tools well-maintained and sharp improves their performance and lessens your burden. The following tools will likely be adequate for most of your pruning activities:

Pruning Shears – Probably one of the most essential tools to own. They cut up to 3/4 inches in diameter.

Lopping Shears – Similar to pruning shears, but have long handles providing better leverage when cutting branches up to 1 1/2 inches in diameter.

Hand Saws – are essential for cutting branches over 1 1/2 inches in diameter. Most hand-held pruning saws can easily cut through branches 4 to 6 inches in diameter.

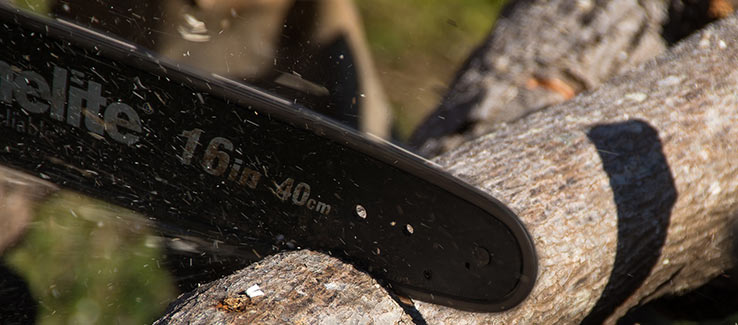
Chain Saw – Should be used on larger branches. Never use a chain saw to reach branches above your shoulders or when on a ladder.

Chainsaws are used to prune large branches typically over six inches in diameter

Pruning Tree Branches

In this article, you discovered essential information on how to prune tree branches, why they should be pruned, when to prune, and some of the equipment you may need.

Correct pruning activities can strengthen a tree’s health, encourage vigorous growth, remove diseased or infested branches, and extend its life expectancy by years or decades.

Ignoring the need to prune your trees can result in overgrown, diseased, and dying trees capable of causing catastrophic damages when they fall on your property.

Sources:
extension.umn.edu/planting-and-growing-guides/pruning-trees-and-shrubs
mortonarb.org/trees-plants/tree-and-plant-advice/horticulture-care/pruning-evergreens
arbordayblog.org/diy/diy-spring-flowering-trees-pruned/
cesonoma.ucanr.edu/files/27164.pdf
aces.nmsu.edu/pubs/_h/H156/welcome.html

Fast Tree Removal Services Atlanta
3379 Peachtree Road #555aAtlantaGA 30326
(404) 220-9965

Fast Tree Removal Services Dunwoody
2111 Peachford CirDunwoodyGA 30338
(404) 220-9963

To view the orignal version of this post, visit: https://www.fasttreeremovalatlanta.com/how-to-prune-tree-branches

Tuesday, July 17, 2018

10 Summer Gardening Tips

Healthy summer garden with tulips

Summer brings with it an explosion of plant, animal, and insect life. It is the time when our efforts in the garden become most evident and the time we must pay the closest attention to it.

From watering to fertilizing and from pruning to deadheading, the team at Fast Tree Removal Services Atlanta has compiled 10 tips to help you turn your garden into a beautiful showcase of your efforts.

Tips for a Successful Summer Garden

The following tips will help you achieve a brighter, healthier, and more beautiful garden throughout the summer months.

1. Watering in Summer Months – As the weather heats up, your garden is going to need more water. Here’s how to accomplish this:

  • Water in the evening or early morning.
  • Water slowly using a soaker hose or a dripline with a bucket (holes at the bottom of the bucket release water slowly through hoses or tubes). This is called deep watering and will encourage all roots to thicken and grow deeper.
  • Plan on watering at least once per week, and in drier locations, two or three times per week.
  • Avoid overwatering. When the top two inches of soil remains moist, postpone the watering for a day or two. Browning of the foliage and root rot can occur from overwatering.

Watch this video to learn how to assemble a dripline using a standard bucket.

2. Soil Preparation for Plant Growth – Preparing your garden’s soil will be greatly influenced by what you intend to plant or already have planted. The following will help you enrich and balance your soil:

  • Start with dry soil (trying to turn wet or moist soil will make a big mess). Turn the top 6-8 inches while adding well-decomposed manure or finished compost.
  • Remove rocks and break up large clods.
  • When you run into roots, know where they are coming from. Cutting through tree roots may leave the tree susceptible to disease and infestation, potentially causing serious problems for the garden. More often than not, the mycelia that surround and colonizes tree roots will do the same to plant roots, creating a beneficial ecosystem for them to coexist.
  • Check the pH level of the soil. Levels range from 0 to 14 with 7 being neutral, below 7 is acidic and above 7 is alkaline. Most plants will thrive when the pH level is between 5.5 and 7. The addition of limestone will raise the pH level, while compost and organic materials will work to lower it.

Watch this video to learn different methods of measuring your soil’s pH level.

3. Weed the Garden to Remove Competing Roots – While diversity in a garden is important, weeds cause more problems than they are worth. Here’s how to get rid of them without the use of chemicals.

  • Use a spade or garden rake to loosen the soil around undesired growth. Pull the weed and as much of the roots as possible to prevent regrowth.
  • Dispose of or destroy these plants away from the garden and compost pile.
  • Any time you see something that shouldn’t be there, remove it. Weeds grow fast and can rapidly take over a section of your garden if left unchecked.
Weeding in summer garden Atlanta ga

4. Planting for Optimized Growth – Know the species of plants and shrubs in your garden and how much light they need.

The location of your garden with respect to physical structures, shrubs, and trees will determine the amount of direct sunlight it receives. The following are the categories playing a part in the growth and health of your garden:

  • Full Sun – six hours per day,
  • Partial Sun/Partial Shade – three hours per day,
  • Shade – less than two hours of sunlight per day, and
  • Indirect Light – bright light without direct sunlight,

Knowing this factor will help you select the right plant species for your garden. Plants sold in nurseries, garden centers, or even seed packets will have the recommended sunlight exposure printed on the label.

5. Planting Vegetables – If you have a large, spacious garden, vegetables would make a great summer addition to it. The warmth of the soil and air along with intense sunlight facilitate their rapid growth. Some great examples are:

  • Tomatoes
  • Beans
  • Corn
  • Squash
  • Peppers
  • Celery
Tomatoes growing in summer garden

Take a look at this vegetable planting calendar by the University of Georgia for the state of Georgia.

6. Fertilize Your Garden to Encourage Growth – If you have properly prepared your soil with organic material, your plants may not need to be fertilized. For heavy feeding vegetables like corn and tomatoes. However, a slow release nitrogen-rich inorganic fertilizer should be worked into the soil just before they are planted.

  • Inorganic fertilizers deliver immediate nutrients and promote faster growth.
  • Organic fertilizers release nutrients at a much slower pace but produce healthier soil.

7. Mulch to Protect the Soil and Roots – Mulch works for gardens the same way it does for trees. The addition of a layer of organic mulch to your garden provides the following benefits:

  • The soil will retain more moisture.
  • Mulch naturally balances soil temperatures, preventing overheating and excessive drying.
  • As the mulch decomposes, nutrients and nitrogen are released into the soil.
  • For both annual and perennial gardens, old mulch should be removed and replaced with new mulch each spring. This prevents rot from occurring and continues the delivery of nutrients to the soil. Avoid layering mulch on mulch.
Summer garden mulch with wood chips

8. Pruning Plants and Shrubs – While pruning activities should take place in late winter and early spring, there is never a bad time to prune the following:

  • Dead or dying foliage, leaves, and stems.
  • Disease infected sections of a plant.
  • Insect infested or heavily damaged sections of a plant.
  • Invasive or interfering growth on sidewalks, pathways, or roads.

9. Deadheading To Encourage Stronger Growth – Deadheading is nothing more than removing faded or spent flowers. This process allows the plant to use its resources to grow stronger and in many cases continue to bloom further into the season.

10. Pest Control to Keep Your Garden Healthy – Flowering plants and shrubs will naturally invite insects and pests to your garden and landscape. Birds, bees and other pollinators, and other predators are very effective at keeping their numbers down. You can take the following steps to prevent infestations from occurring:

  • Frequently inspect your garden, shrubs, and trees for signs of infestations.
  • When you spot a bug problem, spray a simple solution of 2Tbsp of dish soap to 1 gallon of water to the affected area and all surrounding foliage from the top and bottom.
  • Consult your local nursery. They may have current information on which pest problems are affecting your area and how to prevent an infestation.
  • Keep an eye on your trees. Tree infestations can have serious ramifications on your entire landscape. When you detect an infestation or trouble with one of your trees, call a tree service to evaluate the situation and offer a course of action.
Aphid insect infested plant in garden

For other tips to maintain a healthy lawn during summer visit http://www.pearltrees.com/homegardeningguide/item224772263

Garden Design and Location

The design and location of your garden play a significant role in what to plant and where to plant it.

As each season rolls through, keep a journal on how well or poorly your plants did. How much sun they got, the watering schedule, infestations, diseases, the soil pH level, etc.

This information will help you determine how to adjust the soil, choose plant species, or even move the garden’s location entirely.

How ever you go about growing your garden, keep it fun. When possible, stop to smell a flower or two.

Sources:
https://www.oregonmetro.gov/tools-living/yard-and-garden/garden-problems/summer-garden-pest-control
https://kidsgardening.org/gardening-basics-preparing-the-soil/
http://www.ukgardening.org/gardening-basics.php
http://ucanr.edu/sites/gardenweb/general/

https://plus.google.com/+Fasttreeremovalatlantaservices

Fast Tree Removal Services Atlanta
3379 Peachtree Road #555a, Atlanta, GA 30326
(404) 220-9965

To view the orignal version of this post, visit: http://www.fasttreeremovalatlanta.com/10-summer-gardening-tips

Thursday, November 10, 2016

Tree Planting - Soil Considerations and Tree Care Tips

Your first priority when getting ready to plant new trees on your land should be ascertaining the quality of the soil. There are a lot of different factors to consider, such as the density of the soil, the nutrients that are currently present in the soil, and its ability to hold water well enough to facilitate new growth. Remember that you are not only looking for an environment where your plants can thrive, but also where beneficial microorganisms will be living.

Different Kinds of Soil


Across the planet, you'll find many different kinds of soil with many different qualities. The soil type will affect your gardening in a few ways, and will be the main deciding factor in how well your soil can keep its moisture and its density, as well as how nutritious it is. Here are two main kinds of soil that you may encounter:

Sand-rich Soil – Most of the time, this kind of soil is not very nutritious, but the particulates are not too dense and this allows for good air circulation. Unfortunately, this latter quality also causes it to dry out more quickly, so if you need the soil to hold a lot of water, this is not the ideal type.

Clay-rich Soil – This kind of soil is dense and tends to clump together, reducing air circulation and making it easier to hold moisture. It is also a fairly nutritious soil.

Ascertaining Conditions and Preparing the Soil


As soon as you know what kind of soil you have on your property, you can anticipate some of the problems you may face. A few problems you may encounter are:

Drainage Issues – If you live in a dry area or are experience drought, having a soil that holds moisture well can be a lifesaver. On the other hand, if you live in a relatively wet environment, soil like this could potentially drown a tree or cause fungal infections to run wild. Without proper access to air, the trees roots will be unable to “breathe.”

One easy fix is to simply mix in some sand to the soil, which will increase air circulation and fix the drainage problems. While you're making this mixture, it is probably a good idea to add some organic material for nutritional value.

Soil is too compact – Soil might be too compact for a few reasons. For one, just having a high amount of clay will make the soil stick together too much. Think about how clay bricks are made, and you're not too far off from what can happen to clay in nature. If lots of animals and humans trudge through the soil, compaction can also occur, and this can again suffocate the plant's roots. It can potential create a drainage issue as well, since the water will have a difficult time penetrating the ground.


In order to make the soil a bit more airy, add mulch or other similar matter to the soil. This will make the soil less dense and it will retain more air this way. You can also try to aerate the soil with a garden tool, or sifting through it by hand. Just avoid working with it while it's saturated with water.

Don't Prune Just Yet


Trees can suffer shock when they are transplanted, so don't give it too much to deal with at once by pruning. Leaves serve an important function and they are what creates food for the plant as well as what releases waste product into the air. Let the tree have as much energy as it can make before and during the transplant period and it will be less likely to die on you. Don't prune the tree until after it's accustomed to its new environment, and only prune dead leaves and branches. If you want your tree to have a certain look, then hire a professional—they should know how to make the tree more aesthetic pleasing without harming the tree or introducing pathogens.

Avoid Planting in Extreme Depths


You may feel that you have a deep relationship with your plants, but that doesn't mean you have to dig a deep hole for your tree to live in. In fact, in order for your tree to get the kind of aeration and water that it needs, keep things fairly superficial and place the tree in a shallow, but wide hole. The tree will initially be more concerned with spreading its roots horizontally, and it will take care of the depth on its own as it grows. Just as with human relationships, if you get too deep too fast, your tree might just suffocate, so plant it near the surface and let it do things at its own pace.

Do Some Mulching as a Finishing Touch


Mulching is a subtle art, but it should be done. Too much mulch, and you could cut the roots off from their air supply or cause an unhealthy build-up of water; but not enough mulch and weeds and other pests could take hold or the soil could dry out much too quickly. Again, the trick is to give the tree some space. Start the mulch at about a half-foot radius from the tree's trunk, and only use about three inches of mulch. Make sure to also check the mulch every once in awhile for any organisms that shouldn't be there, like fungus or mold.

Contact us or check the blog for more tree planting, trimming and landscaping tips. https://plus.google.com/+Fasttreeremovalatlantaservices/about

Fast Tree Removal Services Atlanta

3379 Peachtree Road #555a Atlanta, GA30326
Tel: (404) 220-9965
This post Tree Planting – Soil Considerations and Tree Care Tips appeared first on http://www.fasttreeremovalatlanta.com.